CS40 Lab 6: Texture mapping and procedural methods
Applying the texture should be fairly straightforward if you follow the texture example from w07-texture. Keep in mind though that the texture is at 10 times the resolution of the terrain (see grid info for details). And you will need to perform a mapping between texture coordinates (0..1) to your scaled terrain coordinates. You may want to experiment with a small patch of the terrain and texture first before attempting to do the entire texture.
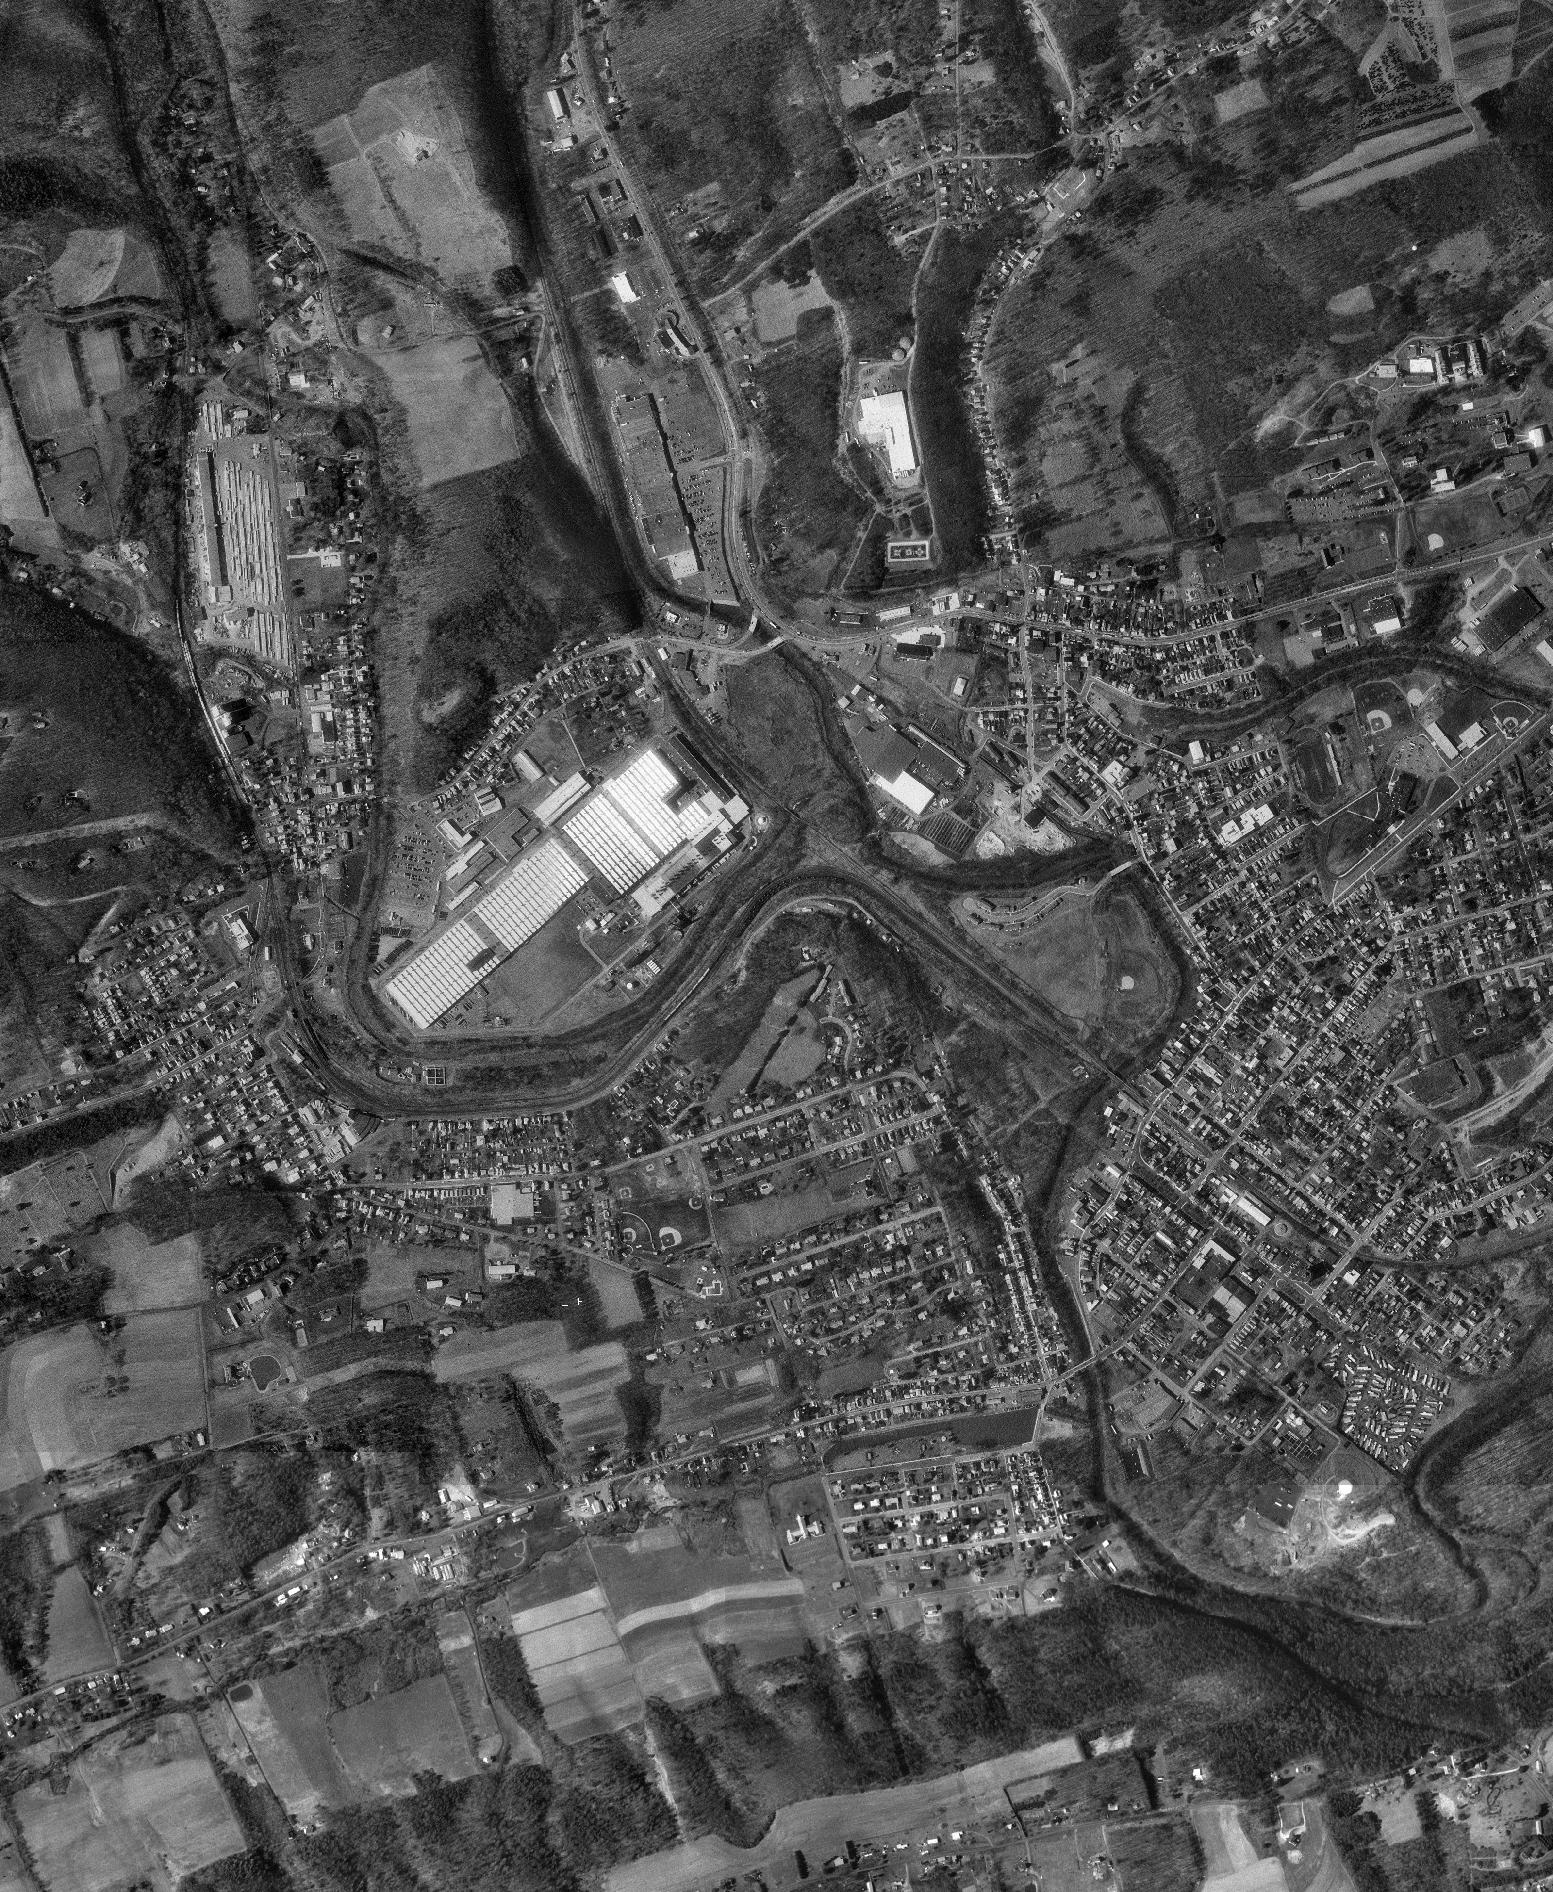
There are however three things that are a bit tricky. First, the buffer for the texture data must be a contiguous block of space, so you cannot dynamically allocate a 2D array. You must instead allocate a 1D array and pack the pixel data from the ortho imagery into this 1D array. The function makeCheckImage in texterrain.cpp shows an example of how this might work. The second trick is that in texture coordinate (0,0) is in the bottom left of the image, but (0,0) is the top left in grid. A correctly rendered ortho image should look like the image shown below.
Finally, some of the graphics cards (notably the HP machines) suck. There is a snippet of code in texterrain.cpp that checks if it should be possible to load the entire ortho photo as an texture map. I have tried a few machines, and even the HPs claim they can load the texture, but don't be afraid to downsample if needed. If your terrain project was slow before, adding a texture with 10 times the resolution is unlikely to make it faster. Note you should be able to decimate the grid at a lower resolution and use flat normals and apply the texture to the coarse grid to try and help performance. I highly recommend just applying the texture map to the square in texterrain.cpp as practice before slapping the imagery on the full terrain.
If you are curious as to how good the graphics card on your lab machine is, try typing grep -i mem /var/log/Xorg.0.log. Something like (II) fglrx(0): VESA VBE Total Mem: 16384 kB (on almond) indicates a sluggish 16MB card, while (--) NVIDIA(0): Memory: 524288 kBytes (on lime) indicates the sweet 512MB cards. The silver door on the machines is your gateway to success. The HP logo is an indication that the machine needs replaced soon.
This part of the assignment is fairly open ended. You can hard code your favorite plant if you like or try to handle more general constructions. My only requirement is that you model be 3D and contain at least two shapes (e.g., a branch and a leaf). You may add non-determinism or probabilistic rules to your plant if you wish.